Editing in general
To open the Template Editor, select an existing Template from the templates list and click Toolbar button “Tasks”. Another way to open a template in the template editor is to double-click a template in the templates list.
The template editor is the tool allows adding/editing/deleting/moving around the contents of a template: Tasks (items to be evaluated during assessments, drawn from a Task Analysis) script text, titles, file attachments and other custom elements. A template can also contain file attachments, which can be added with the template editor.
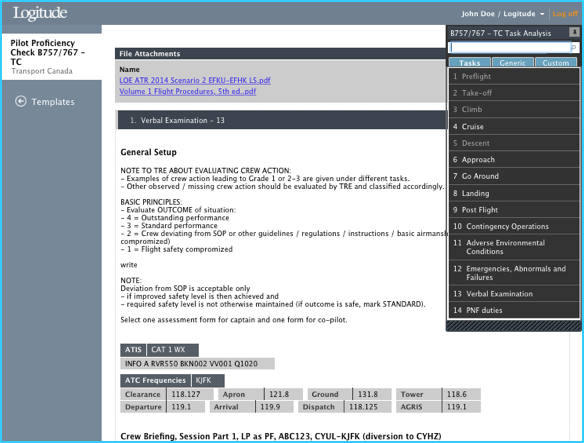
The template editor is a WYSIWYG editor and it allows the user to edit the contents of the template directly in the web browser, as well as dragging and dropping the elements to help arranging them.
The Toolbox element (in the top right hand corner of the screen) is where new elements can be dragged onto the template. The Toolbox opens up by hovering the mouse pointer on top of the Toolbox bar. The available Toolbox task structure depends on how it has been configured in the Task Analysis Editor.
The template editor displays the template in question very much like when filling in an assessment in Assessments section, with the difference that also the “Toolbox” is available and hence the contents of the template may be modified and saved. Another difference is that the names of the trainee(s) in the very top portion of the screen is not visible, neither are the Basic information and Summary and signatures bars.
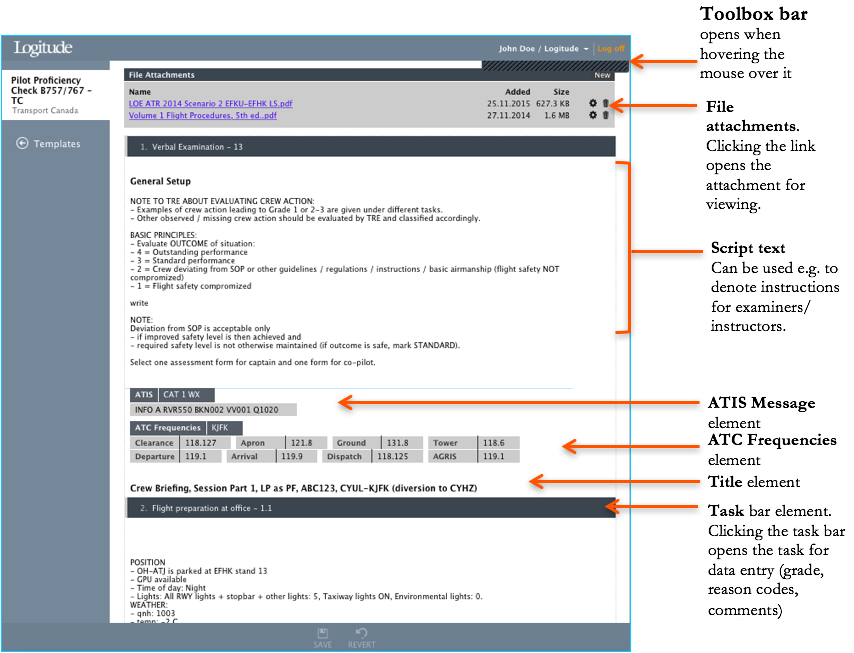
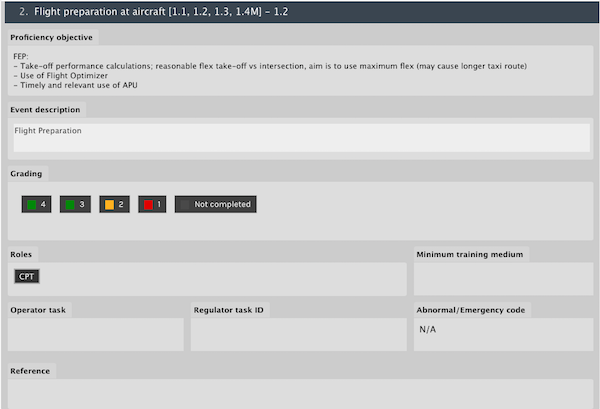
Note. The Event description is the only element within a task which can be edited in the Template editor. All other aspects of the Tasks must be edited with the Task Analysis editor, because they are common to all templates which uses the task in question.
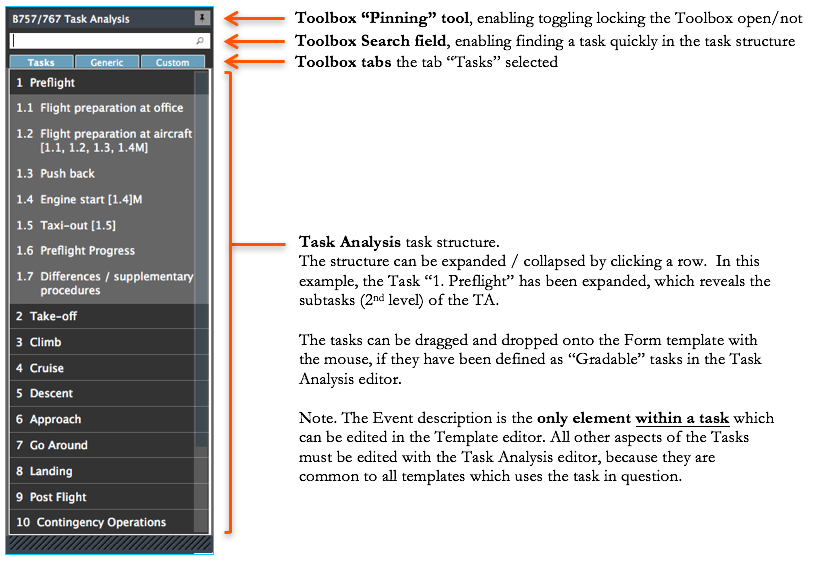
The Template Editor toolbox
Toolbox tab "Tasks"
Toolbox tab "Generic"

Toolbox tab "Custom"
The Custom tab allows the use of predefined ATIS messages and ATC frequencies when constructing templates. Although it is easy to write ATIS message and ATC frequencies as text (using Script Blocks) on any form, using predefined elements from the toolbox has certain benefits. First, if there is the need for using certain ATIS or ATC setups regularly, e.g. CAT1 weather, or ATC frequencies for the “home base” (where training/checking often takes place in the simulator) it saves time to use predefined data. Secondly, if it is desirable to standardize conditions used in form templates (e.g. CAT1 weather), this is easily done by predefining that and using only the predefined sets.
The Toolbox functions for ATIS messages and ATC frequencies contains the functionality required for predefining them, and also the drag-and-drop functionality to enable using the predefined ATIS’s / ATC Frequencies on templates.

ATIS Messages
Creating ATIS messages can be done by selecting “ATIS Messages” which opens up the list of existing predefined messages.
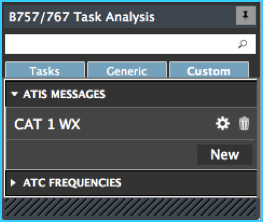
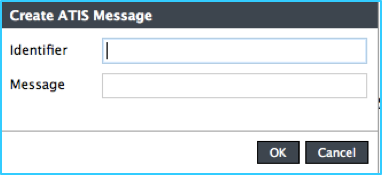
- The “New” button is used to create a new predefined ATIS message. See below for the “Create ATIS Message” dialog.
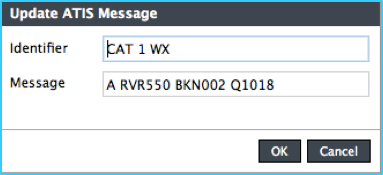
- The settings wheel appears when hovering the mouse over the element is used to edit the existing element. The settings wheel is used to edit the existing element. See below for the “Update ATIS Message” dialog.
- The “Trash bin” is used to delete an existing element.
Create ATIS message
Update ATIS message
ATC Frequencies
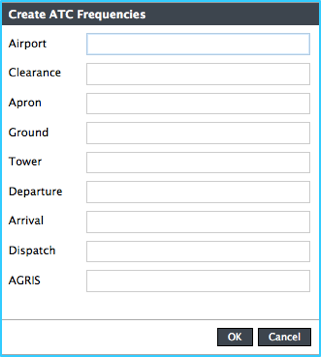
Creating ATC Frequencies can be done by selecting “ATC Frequencies” which opens up the list of existing predefined frequencies.
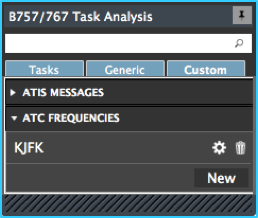
- The “New” button is used to create a new predefined ATC Frequency.
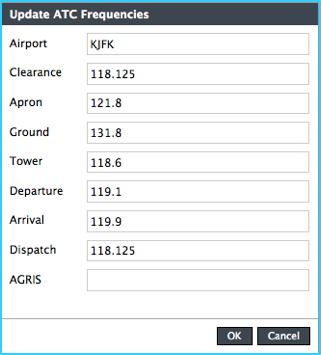
- The settings wheel appears when hovering the mouse over the element. The settings wheel is used to edit the existing element.
- The “Thrash bin” is used to delete an existing element.
Create ATC Frequencies
Update ATC frequencies
Publishing and unpublishing a Template
Selecting an existing Template from the templates list and clicking Toolbar button “Publish” / “Unpublish” will either publish or unpublish the template. Published templates are available for use and they will also be synched to the mobile application, whereas unpublished templates will not.
Printing a PDF of a blank template
Selecting an existing Template from the templates list and clicking Toolbar button “PDF” allows for create a PDF file of the Template in question. Clicking the “PDF” Toolbar button opens up a menu with selections “Full template”, “Task names only” and “Task names and event descriptions.”
Each of the above-mentioned alternatives are PDFs created of the Template in question and their content /level of detail vary slightly from each other.
The PDFs will open up in a new web browser tab.