Users tab
Users tab contains a list of all users. A search tool is provided in the upper right corner.
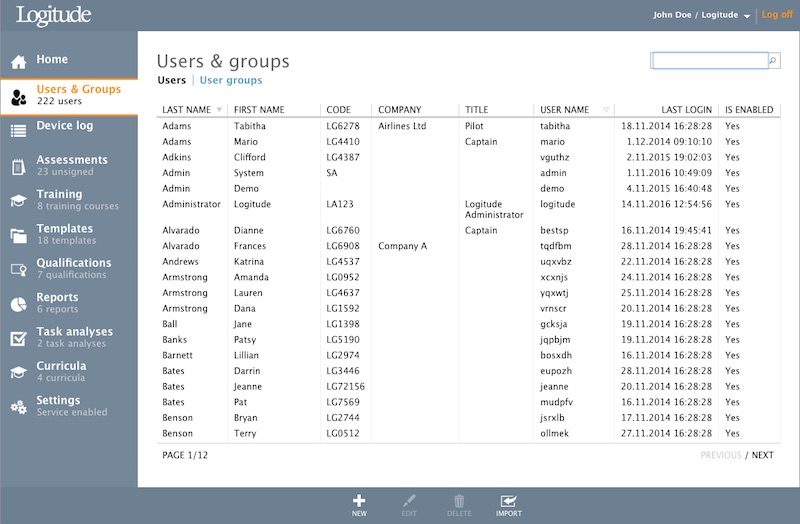
In the bottom part of the screen is the toolbar, which has following buttons:

- New: Create new users.
- Edit: Edit selected user. This button activates when user is selected from the list.
- Delete: Deleted selected user. This button activates when user is selected from the list.
- Import: Import users using excel file. Note template for this file is provided by Logitude Support.
Create new user
You can add a new user by clicking “New” button in the Toolbar. This opens up the “New user” page where user data is inserted.
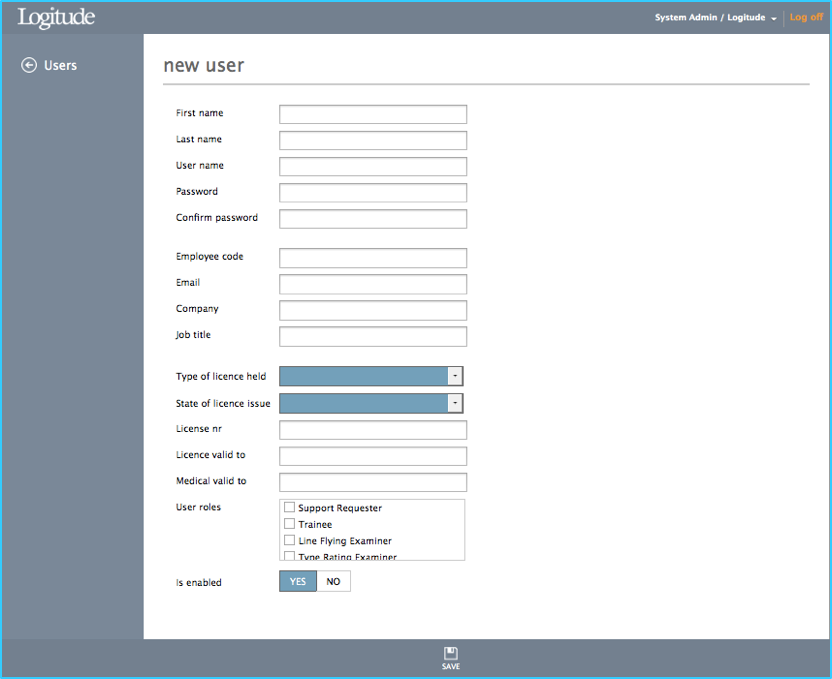
See description of each field in table below:
| Field | Description |
|---|---|
| First name | Mandatory |
| Last name | Mandatory |
| User name | Mandatory. Used for login credentials. Must be unique in the system. |
| Password/Confirm password | Mandatory. Same password must be inserted in both fields. The user can also change this after a succesful login. |
| Employee code | Must be unique in the system |
| Email address for the user. While this is not mandatory input, it is required when user wants to reset his/hers forgotten password. The new password will be sent to user's email address. | |
| Company | Company name |
| Job title | Job title |
| Type of license held | CPL (A) or ATPL(A) |
| State of license issue | Country that has issued the license |
| License nr | Caa issued license number |
| License valid to | Last date of validity of the license in dd.mm.yyyy format |
| Medical valid to | Last date of validity of the medical certificate in dd.mm.yyyy format |
| User roles | Determines which ETR functionalities will be available for the user. Multiple selections are possible. User roles are defined in table below. |
| Is enabled YES/NO | If selected NO, the user cannot login. |
User role descriptions
| User role | Description |
|---|---|
| Support Requester | Enables Support in main menu |
| Trainee | User is able to view and sign assessments and to view qualifications |
| Line Flying Examiner | Examiner is able to submit line check assessments and view, edit and print assessments submitted by him/her. Able to login to iPad application |
| Type Rating Examiner | Examiner is able to submit assessments and view, edit and print assessments submitted by him/her. Able to login to iPad application |
| Reporting Administrator | Able to view Reports |
| Data Administrator | Able to enter legacy assessments to the system |
| Assessment Administrator | Able to C.R.U.D. and publish/unpublish form templates, and to view and edit all active assessments |
| System Administrator | Able to C.R.U.D. users |
| Optimizer Administrator | Able to modify Optimizer related fleet information |
| Curriculum Administrator | Able to C.R.U.D. and publish/unpublish Curricula |
| Training Administrator | Able to C.R.U.D. training courses |
| Device Log User | Able to create and view Device Log entries |
C.R.U.D. = Create, Read, Update and Delete
Note: if you select the Type Rating Examiner role for the user, also the “authorization nr.” and “authorization valid until” field will appear in user attributes and have to be filled.
After inserting the user data clicking Toolbar button "Save" creates the new user.
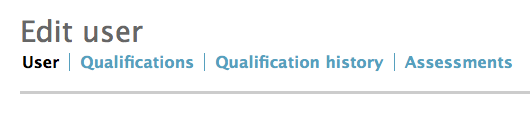
Edit or delete user
Editing an user is done by selecting the user from Users list and then clicking "Edit" button on the toolbar. User data is presented and can be edited similarly when creating a new user.
When editing a user, there are also tabs for maintaining user's qualifications, viewing qualification history and list of user's assessments.
You can edit a user by highlighting a user in the user list and clicking “Delete” on the Toolbar. This will open up a confirmation dialog. By clicking “Yes” you the user will be deleted and will not appear any longer on the Users list.
Tip! If a user is deleted by mistake no worries! The operation can be reverted, and the user – including ALL associated data – can easily be returned by Support.
Qualifications tab
This view enables viewing and editing of a user’s qualifications.

Toolbar buttons available for this view:
- New: Add new qualifications
- Edit: Edit selected qualification. This button activates when a qualification is selected.
- Delete: Deleted selected qualification. This button activates when a qualifiation is selected.
Add, edit or delete qualification
Clicking "Add" toolbar button opens "Add User Qualifiation" dialog.
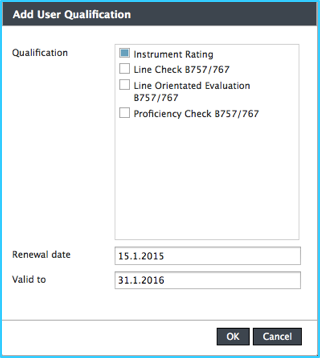
Adding new qualification to a user requires three inputs:
- Qualification: Select a qualification which is added to the user. This list is populated by qualifications defined in the Qualifications menu. Mandatory input.
- Renewal date: Date when qualification was issued/renewed. Optional information. Date format dd.mm.yyyy.
- Valid to: Last date when qualification is valid. Mandatory input. Date format dd.mm.yyyy.
Selecting a user qualification from the list and clicking “Edit” opens “Update user qualification” dialog. The dialog is used to update Renewal date and Valid to date of the qualification in question.
Deleting user qualification is done by selecting the qualification from the list and clicking "Delete" button on the toolbar.
Qualification history tab
This view enables viewing the renewal history of a user’s qualifications (which qualification has been updated, and when).
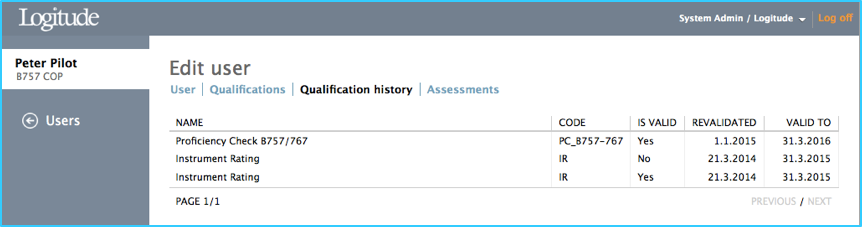
Note. The “code” and “Is valid” date appears on Assessment forms Header (situation before the assessment has been completed) and Footer (the revalidated date after the assessment has been completed and signed).
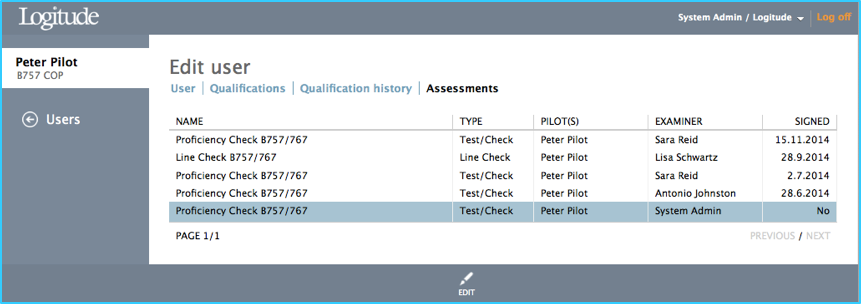
Assessments tab
This view enables listing and fetching any assessment performed for the user in question.
User Groups
User groups are used to easily define same permissions for a large group of users. For example having user group "B777 Line Flying Examiners" and then defining that all members of this group can approve line training items for B777.
User Groups tab has following toolbar buttons:
- New: Add new user group
- Edit: Edit existing user group. This button activates when a user group is selected from the list
- Delete: Delete existing user group. This button activates when a user group is selected from the list
Adding a new user group
To add a new user group, click toolbar button "Add". A dialog "Create New User Group" opens with following data fields:
- Name: Name of the user group
- Description: Description of the user group
- Group Members: Select group members by using the search window and then add members to the group by selecting them. Removing a user from a group is done by double-clicking the user in the group members area.